“It’s the latest, it’s the greatest
Mashed Potato, ya, ya, ya-e-eah!
Mashed Potato started along time ago
With a guy named Sloppy Joe!”*
Ahhhhhhhh…sweet, sweet memories! The chart-topping hit song that inspired the dance, undoubtedly inspired many a youth, myself included, to eat potatoes…mashed or otherwise. And starting two years ago, potatoes have become a hit at Nolan’s “Planting the Seed” garden. Our first attempt to grow potatoes was such a success that we had to grow them again this year and grow they did, we had a fantastic crop.
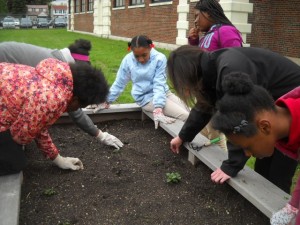
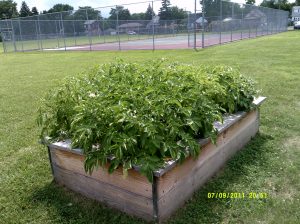
Taking care of the bed!
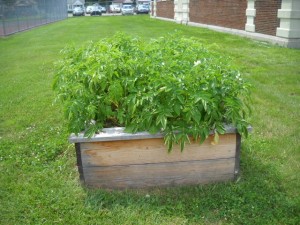
So lush…so green!
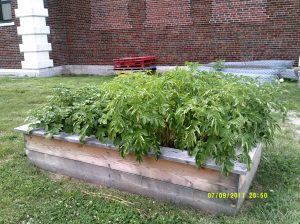
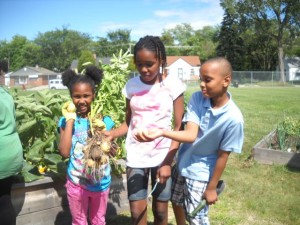
Who knows what secrets lie below ground?
Are they ready? They gotta be ready?
As members of “Keep Growing Detroit”, my sister Jenni and I were able to combine what we got as participants of the program along with what Bonnie Odom-Brown received also, to insure that we were going to be able to plant a considerable amount of “seed pieces” to begin with. It can’t be stressed enough how important Keep Growing Detroit is not only to the efforts of the Nolan school garden but to other gardens in the cities of Detroit, Highland Park and Hamtramck.
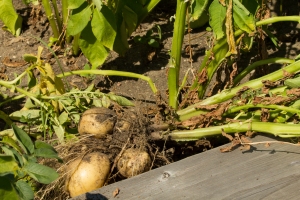
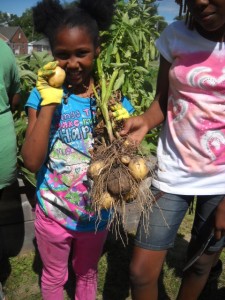
Dig them potatoes!
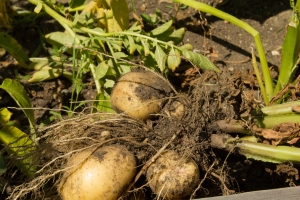
Ain’t they purty?
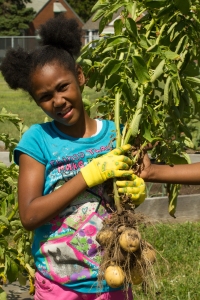
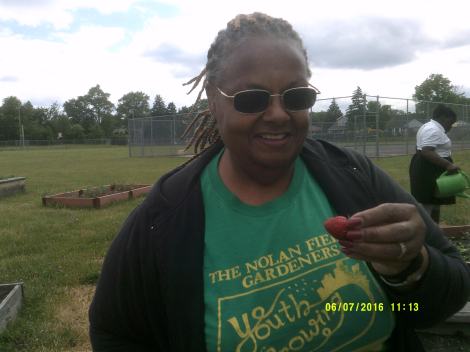
A happy “fierce Nolan gardener”
Following their instructions, Maura Ryan-Kaiser and Bonnie Odom-Brown loaded one of our raised beds with three different varieties of spuds, Yukon Gold, Kennebec and Red Skins. That was basically it! We watered when necessary and fortunately with all the rain we got this summer, we didn’t have to do too much of that. We did have to keep adding more soil to the bed, a process called “hilling”, but other than that it was purely a walk in the park!
Mama Mama, look what we grew!
A little dirty but, Mmmm Mmmm Good!
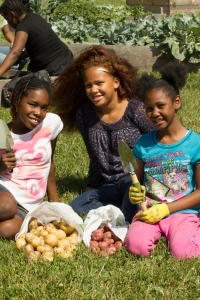
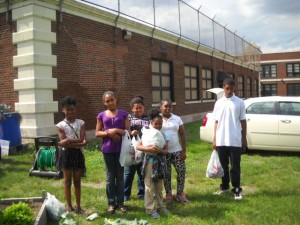
All the young girls!
Dividing up the days harvest!
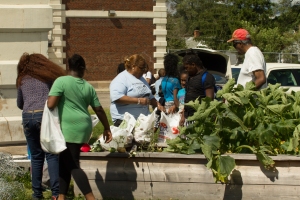
Guess what’s for dinner?
What did we do with the potatoes once they were harvested? Well, I would recommend using them in a frittata. There’s a lot of different frittata recipes, but I like the “Bacon and Potato Frittata”. This recipe includes a lot of the vegetables we grew in the garden this year and I bet you will enjoy it as much as I do.
Bacon and Potato Frittata
Gourmet Live | April 2012
by Gina Marie Miraglia Erique

photo by Lara Ferroni
Yield:
Makes 4 servings
active time
35 minutes
total time
35 minutes
Consider the recipe below as a loose template to be altered according to what you’ve got lying around. You can substitute cooked pasta and rice for the potatoes, and cooked greens for the raw. Play around with different cheeses, or skip them altogether. It’s your chance to let your frittata freak flag fly!
Ingredients
• 8 large eggs
• 2 tablespoons chopped fresh basil, parsley, or tarragon
• 3 tablespoons grated Parmesan
• Salt and freshly ground black pepper
• 6 slices bacon, chopped
• 1 pound potatoes, peeled and cut into 1/2-inch pieces
• 2 tablespoons olive oil, divided
• 1 small onion, or more to taste, chopped
• 2 garlic cloves, or more to taste, chopped
• 2 to 3 cups spinach or arugula, coarsely chopped
• 1/2 cup chopped roasted peppers, or to taste
• 3 ounces sliced Provolone (5 to 6 slices), optional
• Special equipment: 10-inch heavy ovenproof skillet, preferably nonstick or cast-iron; heat-proof rubber spatula
Preparation
Preheat broiler.
Whisk together eggs, basil, Parmesan, 1/4 teaspoon salt, and 1/4 teaspoon pepper in a large bowl.
Cook bacon in a 10-inch heavy skillet over medium heat, stirring, until crisp. Transfer bacon with a slotted spoon to a large bowl then pour off all but 2 tablespoons fat.
Add potatoes and 1/4 teaspoon each of salt and pepper to skillet, and sauté over medium-high heat until golden, about 3 minutes. Cover skillet and continue to cook over medium-low heat, stirring a few times, until potatoes are just tender, about 3 minutes more. Transfer the potatoes with a slotted spoon to bowl containing the bacon.
Add 1 tablespoon oil to skillet and sauté onion and garlic over medium-high heat until pale golden, about 4 minutes, then add spinach and sauté until just wilted.
Gently add the potatoes and bacon, the roasted peppers, and remaining tablespoon oil into onion mixture, spreading it evenly.
Pour egg mixture evenly over vegetables and cook over medium-high heat, lifting up cooked egg around edges with a heat-proof rubber spatula to let uncooked egg flow underneath, 2 to 3 minutes. Reduce heat to medium and cook, covered, until it appears mostly set, with a moist top and center, 3 to 5 minutes more.
Remove lid. If using Provolone, broil frittata 5 to 7 inches from heat until set, but not browned, 1 to 2 minutes, then top with an even layer of cheese and continue to broil until browned and bubbling, 1 to 3 minutes (watch carefully).
If skipping the cheese, broil frittata until the top is lightly browned, 1 to 3 minutes (making sure it doesn’t burn).
If using a nonstick skillet, slide the frittata onto a serving plate. If using a cast-iron skillet, cut and serve wedges directly from the skillet.
Nutrition Information
per serving (4 servings)
• Calories623
• Carbohydrates25 g (8%)
• Fat44 g (68%)
• Protein30 g (59%)
• Saturated Fat16 g (80%)
• Sodium870 mg (36%)
• Polyunsaturated Fat5 g
• Fiber3 g (13%)
• Monounsaturated Fat20 g
• Cholesterol423 mg (141%)
* Dee Dee Sharp (Cohen, Gorman, Garrett, Dobbins, Bateman, Holland)
Nolan Elementary-Middle School’s
Planting the Seeds Garden is led and sponsored by
Be Culturally Exposed/Bonnie Odom-Brown
Snelling Staffing Services/Maura Ryan-Kaiser
Michigan First Credit Union/Mark Guimond
Project Sweet Tomato/Arthur Littsey